Configure Response Codes for 811 Tickets - Lookups
Response codes are used to communicate how an 811 ticket was handled. When selected on a ticket, the response code can be used to push back to your 811 external system. Response code options are typically configured when an 811 integration is initially setup, but can also be modified in the Lookups module. For organizations with an active 811 integration, NEXGEN recommends reaching out to support@nexgenam.com to ensure adding a new response code manually does not require additional integration adjustments.
For information on setting up a new 811 integration, please reach out to support@nexgenam.com and/or your Client Account Manager. For more information on the initial setup of the 811 module, please see 811 Module Setup - Company Options.
 Navigate to the Lookups Module
- Click Settings in the blue sidebar.
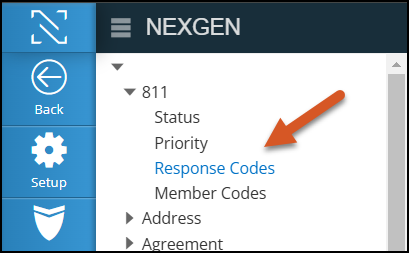
- Click Setup.
- Click Lookups.
- In the hierarchy tree to the left, expand 811 and select Response Codes.
Configure Response Codes for 811 Tickets
Add a New Response Code
- Go to the Lookups module, expand 811, and select Response Codes.
- Click +Add in the top right to create a new response code.
- A slider will appear. In it, enter the response code details.
- Prefix: The prefix displayed on the 811 response code.
- Prefixes are usually 3 digit codes that help users quickly identify a response (e.g., "004-")
- Character Limit: 50 characters
- Text: The text following the prefix, which describes the 811 response code.
- Text examples include "NO MARKINGS REQUESTED" and "LOCATE AREA MARKED."
- Character Limit: 50 characters
- SR Type: The SR type associated with the 811 response code.
- Depending on your 811 ticket needs, organizations can configure different types of 811 tickets and link response codes to those ticket types. 811 SR types are configured under Settings > Lookups > Service Request > SR Type and are marked with the Dig Ticket checkbox.
- Active: Keep this checked if you want this response code to be selectable on the front end.
- The active flag is relevant if 811 response codes become obsolete but historical data is still associated to existing response codes. When a response code in inactive, the response code will not be selectable on any 811 tickets.
- Comment: Text associated with the response code. Currently only visible in the Lookups module.
- In the future, there are plans to have comment notes appear automatically in the response comment field. However, as on version 16.1.0, that is not currently slated for release.
- Click Save.
Edit or Delete a Response Code
- Go to the Lookups module, expand 811, and select Response Codes.
- Next to the response code you would like to edit or delete, click the drop-down arrow.
- Select Edit or Delete.
- If you are editing, select Edit and then click Save to save your changes. See the descriptions in the Add a New Response Code section for details on the fields.
- If you are deleting, select Delete and click Ok to confirm.
Related Articles
811 Module Setup - Company Options
The 811 Module allows organizations that receive 811 tickets from Dig Alert, USA North 811, Ohio 811, or other state mandated 811 providers to receive those tickets in NEXGEN. To fully utilize the 811 module, organizations must have an active 811 ...811 Module Overview
The 811 Module allows organizations that receive 811 tickets from Dig Alert, USA North 811, Ohio 811, or other state mandated 811 providers to receive those tickets in NEXGEN. To fully utilize the 811 module, organizations must have an active 811 ...View & Add Meter Readings to an Asset
Asset meter readings are stored on the asset record. Meter readings can either come in automatically from an integration with a different software or can be manually added to the asset record. View meter readings in a list or view trends in a graph. ...Warehouse Company Options Overview - Warehouse Inventory
When setting up your warehouse, NEXGEN provides multiple options to help you track inventory changes and manage how inventory is moved in and out of your system. To access these settings, you must navigate to your Company Options page. Navigate to ...Create a New Service Request - Service Request
Previously, NEXGEN users were only able to add service requests based on an address. As of the launch of version 12, users are now able to create a service request by address, coordinates, location, or asset. These features were added to expand the ...
Recent Articles
NEXGEN Admin Webinar Series (Part 7: Workflow Automation & User-Defined)
Video Guides: How to Use NAMI Dashboards
Accessing NAMI Dashboards Learn how to locate and access NAMI Dashboards within Work Orders, Service Requests, and Preventive Maintenance. Changing Tabs and Interactive Functionalities See how to navigate dashboard views, explore different metrics, ...June 2026 New Feature Webinar
Latest Phone Release - Version 2.0.5 (June 2026)
Phone Application Updates Asset Inventory Users can now type in an asset QR code in the search bar to find an asset in addition to scanning. (#23758) Form A quick action button to create a form will now be visible in the Hotspot. Users can tap to ...iPad Version 3.0.6 (April 2026)
iPad Updates Bug Fixes Resolved comments cutting off on mobile devices. (#24035) Fixed the issue of a Flag label unintentionally showing when completing assets. (#26071) Users should now be able to request items that are at zero quantity from the ...