Projects Overview - Projects
The Projects module is a NEXGEN feature that helps users track tasks and budgets for various projects and their sub-projects.
Projects Module Overview Video
 Projects Module Navigation and Views
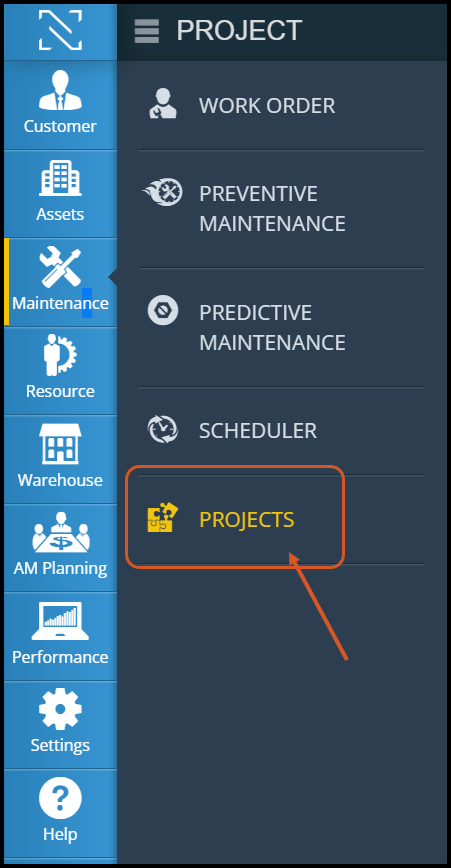
To navigate to the Projects module, click on "Maintenance" on the blue task bar on the left. Then, click "Projects."
List View
By default, the Projects module opens in list view.
You can use the left sidebar bar to look for specific projects, or use the tree hierarchy or filters to drill down to the project(s) you would like to view.
Projects in list view will display with the projects' basic information.
Create a New Project
- From the projects module, click "+New" on the left sidebar.
- If the left sidebar is not visible click on the 3 horizontal lines next to the NEXGEN icon.
- Fill out the fields as needed. Mandatory fields are marked with a red asterisk (*).
- Click "Save" to save your new project.
Project Record Zones
Click into a project to view its full record. Below are a few attributes one might find in a project record.
In addition to items such as the Status, Priority, and Start and End Dates, users can view things such as total budget, remaining budget, child projects attached to this project, and any attachments.
Top Information Zone
The zone at the top of the record lists basic information about the project such as its name, number, total budget, and remaining budget (budget remaining after the costs are attached to the project). Change the status of the project by adjusting the status bar above. If the project is a child project, users can navigate to the child's parent by clicking the link listed at the bottom right of the zone.
UDF (User-Defined Fields) Zone
This zone contains custom UDFs that were added by administrators of your organization for users to fill out. In the example above, the UDFs ask for the Project Manager, a description, and a percentage that indicates project completion.
Child Projects Zone
The projects listed here are children to the project of which you are viewing. Click any project number to navigate to it. Click "+New" or the drop down arrow next to it to add new or existing child projects, respectively. Click the arrow next to any attached child projects to delete them.
Attachments Zone
Use this zone to view or add any attachments to the project, such as photos, URLs, or documents.
Comments Zone
Use this zone to add public comments or notes to the project. Any comments will be timestamped and labeled with the sender's name. To tag another person, type "@" and their username. To edit or delete your comment, use the drop down menu next to it.
Other Zones
Other zones, such as the Work Order, Service Request, and Purchase Zones, can be used to log different attributes of the project and keep track of expenses. By default, data is set to Month to Date (MTD), but it can also be set to Year to Date (YTD) or Life to Date (LTD) as needed.
Related Articles
Create a New Project - Projects
You can use projects in NEXGEN to help categorize your work orders for job costing and tracking purposes. These operate like folders in which you can store project-specific records, such as service requests, work orders, preventive maintenance ...Create New Service Request
A Service request is created when an issue is reported by a customer or an internal employee. Service Requests do not necessarily indicate an issue with an asset. However, if a maintenance issue is discovered for one or more assets while ...Delete an Existing Project - Projects
If you no longer need a project, you can delete it from the Projects module. For instructions on how to do so, see below. Note: If you try to delete a parent project without first deleting its child projects, the system will not let you. The ...Add a Child Project to Parent Project - Projects
You can add a child project to a parent project in NEXGEN. This helps to organize projects and provide more specificity when it comes to items like job costing and tracking. For detailed instructions, see below. Navigate to the Projects Module To ...Create a New Work Order - Work Order
Work Orders are records that track maintenance on one or more assets. When creating a work order, you want to fill out as much information as necessary in the Work Order Information zone to give everyone the info they need to complete the work. Work ...